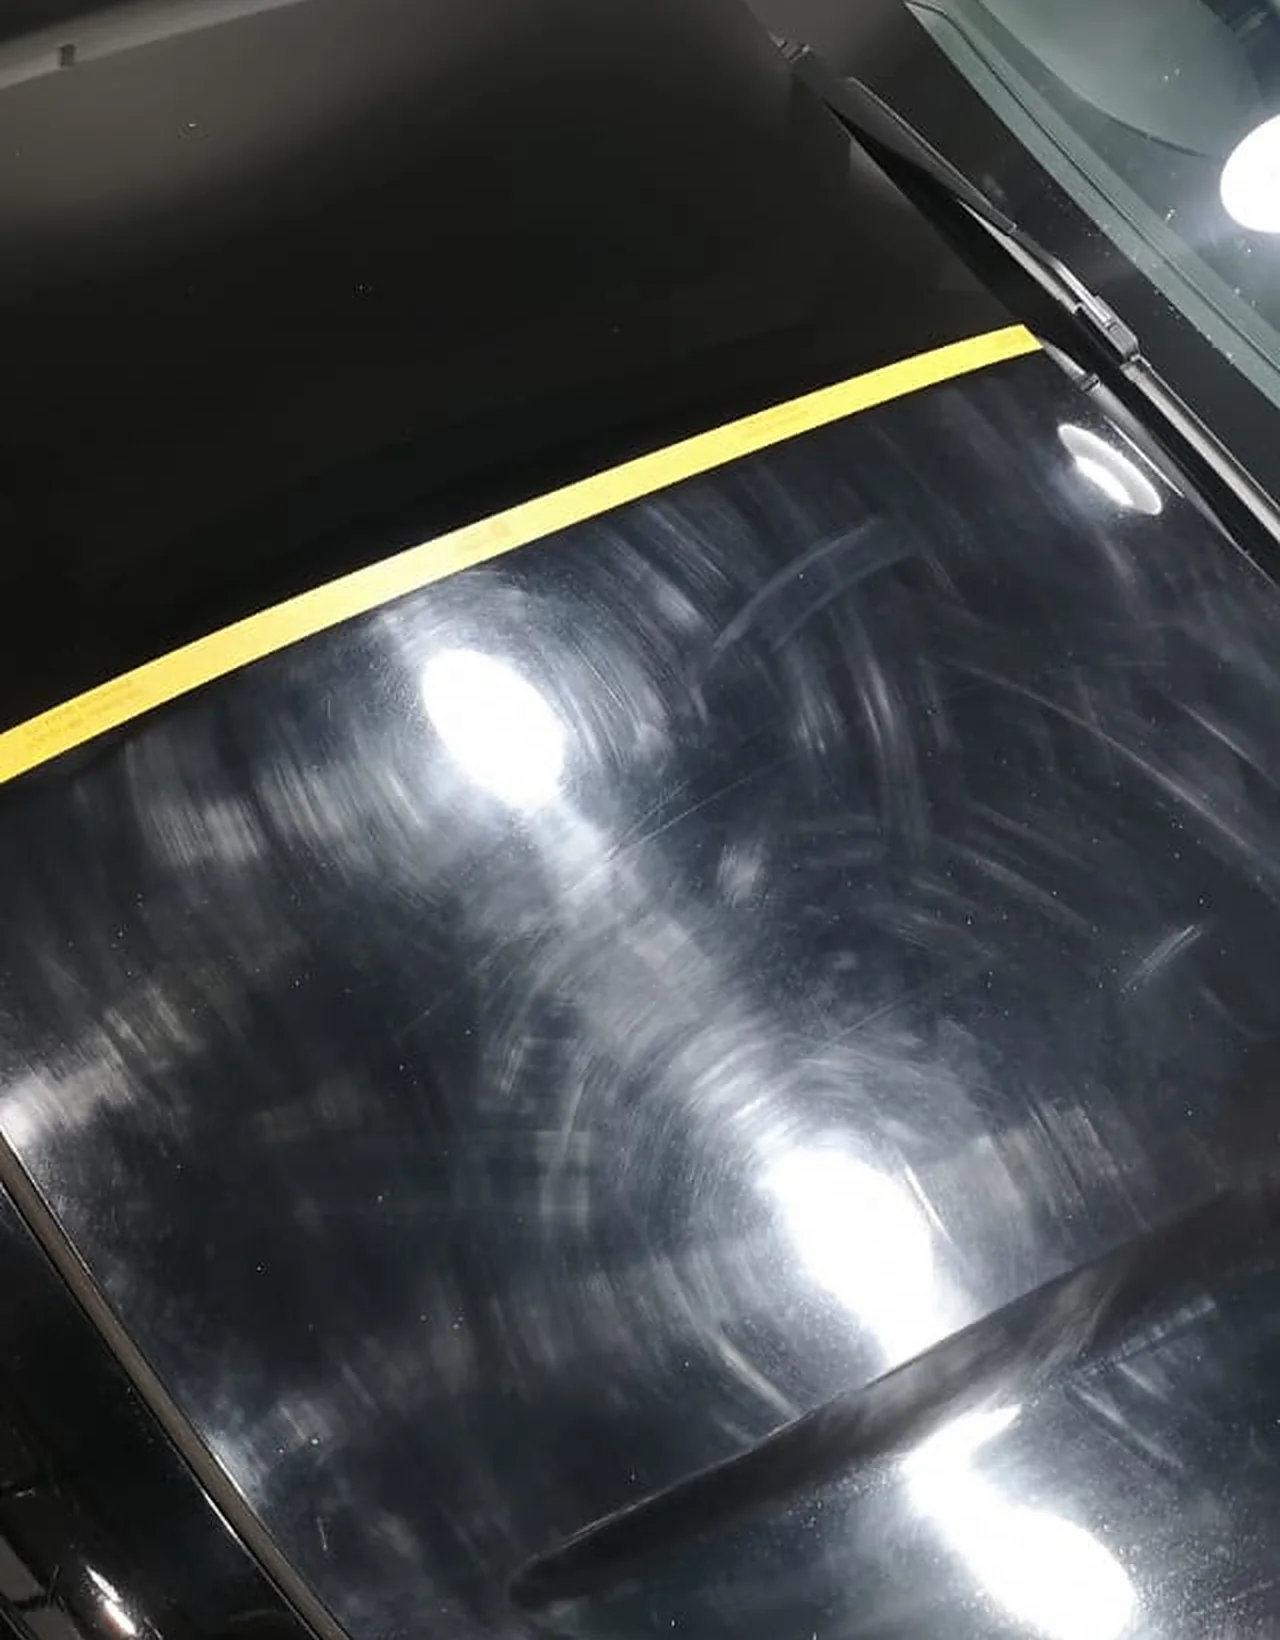
A black Honda HR-V came in carrying the swirl marks you get from a few years of ordinary washing. We taped a line down the middle of the bonnet, corrected the left of it, and left the right exactly as it arrived — so the owner could see the difference before we carried on with the rest of the car.
 Machine polished
As it arrived
Machine polished
As it arrived
Same panel, same lights, same camera. The only thing that changes across that yellow line is the polishing.
Those circular marks are not dirt, and they are not in the colour. They sit in the clear coat — the hard transparent layer over the top — and each one is a scratch fine enough that you’d never feel it with a fingertip. There are thousands of them, and they arrive one pass at a time: the sponge, the cloth, the automatic car wash, the drying towel.
You only see them when a strong point of light hits the panel. That’s why they show up under the studio downlights, under a petrol station canopy and in direct sun, and why they seem to vanish on a cloudy day. Each scratch catches the light and throws it off at an angle instead of reflecting it straight back, so the panel reads grey and cloudy instead of black and deep.
Black shows this worse than any other colour, because there’s no brightness in the paint to hide behind. On a black car every scattered ray is visible against a dark background.
A wash removes what’s sitting on top of the clear coat. These marks are cut into it, so a wash can’t reach them. A wax or a glaze fills them for a week or two and the car genuinely does look better — that’s what a wax is for, and we sell good ones. What it can’t do is take them out.
The only thing that removes them is taking a very small amount of clear coat off, evenly, until the surface is level with the bottom of the scratches. That’s machine polishing, and it’s the slowest and most skilled part of any detail. It’s also the step most often left out.
The tape line proves it on one panel. These two clips were filmed on the same car, in the same bay, under the same lights — the first before correction, the second after. Watch the edges of the reflections: soft and smeared in the first, hard and legible in the second.
Tap either clip to play or pause.
Paint depth and defect check under proper lighting.
Safe wash, clay and iron-fallout removal.
Machine polishing to the agreed finish.
Genuine Angelwax ceramic, cured indoors.
Handover walkthrough + aftercare kit.
Send us a photo of your bonnet in the sun and we’ll tell you honestly whether correction is worth it on your car.
Message Thirty3 on WhatsApp →